Deprecated: Creation of dynamic property WP_Term::$cat_ID is deprecated in /home3/beautjm9/public_html/wp-includes/category.php on line 378
Deprecated: Creation of dynamic property WP_Term::$category_count is deprecated in /home3/beautjm9/public_html/wp-includes/category.php on line 379
Deprecated: Creation of dynamic property WP_Term::$category_description is deprecated in /home3/beautjm9/public_html/wp-includes/category.php on line 380
Deprecated: Creation of dynamic property WP_Term::$cat_name is deprecated in /home3/beautjm9/public_html/wp-includes/category.php on line 381
Deprecated: Creation of dynamic property WP_Term::$category_nicename is deprecated in /home3/beautjm9/public_html/wp-includes/category.php on line 382
Deprecated: Creation of dynamic property WP_Term::$category_parent is deprecated in /home3/beautjm9/public_html/wp-includes/category.php on line 383
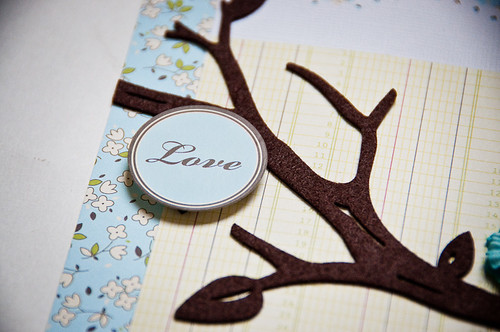
For this one, I thought that an easy sketch would help you get some layouts started. Here’s a sketch created exclusively for My Paper Tree House:

…and here’s the layout I created using this sketch:
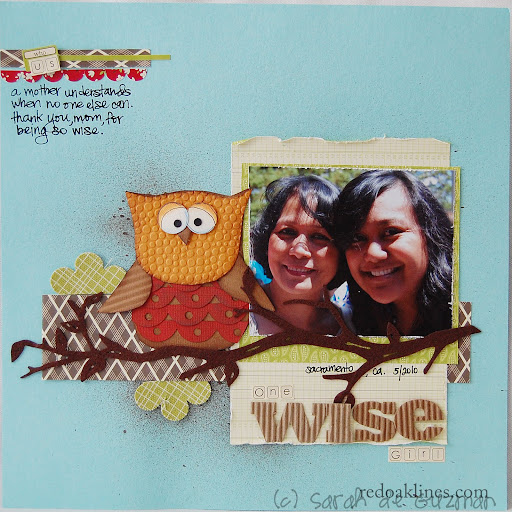
Don’t you just LOVE that cute little owl?! It was exclusive to June’s kit! When I first saw it, I thought… “What a hooooooot!” Hehe!
Okay, back to what I’m really hear for — the challenge! Who’s all going to play along?! Create a layout using that sketch, and you are up to win some a grab bag of Jillibean Soup goodness!
You have until Sunday night to play along! 🙂
Hugs,
sarah.
Deprecated: Creation of dynamic property WP_Term::$cat_ID is deprecated in /home3/beautjm9/public_html/wp-includes/category.php on line 378
Deprecated: Creation of dynamic property WP_Term::$category_count is deprecated in /home3/beautjm9/public_html/wp-includes/category.php on line 379
Deprecated: Creation of dynamic property WP_Term::$category_description is deprecated in /home3/beautjm9/public_html/wp-includes/category.php on line 380
Deprecated: Creation of dynamic property WP_Term::$cat_name is deprecated in /home3/beautjm9/public_html/wp-includes/category.php on line 381
Deprecated: Creation of dynamic property WP_Term::$category_nicename is deprecated in /home3/beautjm9/public_html/wp-includes/category.php on line 382
Deprecated: Creation of dynamic property WP_Term::$category_parent is deprecated in /home3/beautjm9/public_html/wp-includes/category.php on line 383

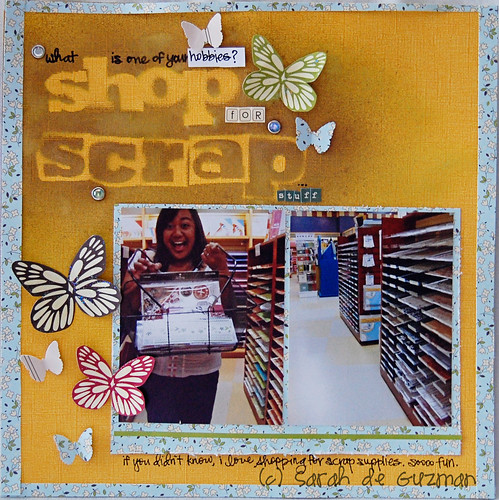
There is tons of Jilly Bean Soup in this kit, as well as some Prima & Websters Pages. To see list of eveything in the kit & to check out of the the yummy add-on’s click here. $5 from the purchase of every kit will go to Save the Children foundation, so you will bet getting scrapping goodies while doing something good. Get your while there are still some left. I am still having a wonderful time creating with this kit, and would like to share a couple of the layouts that I have made so far with you!
The picture I used on this layout is of me when I was a little girl. When I look at this photo I am reminded of the little girl I used to be. Even though I was small I had a very strong sense of self and had an intuitive knowledge of who I was. This layout is a personal reminder for me to always remember and hang onto the internal confidence I possessed even then.
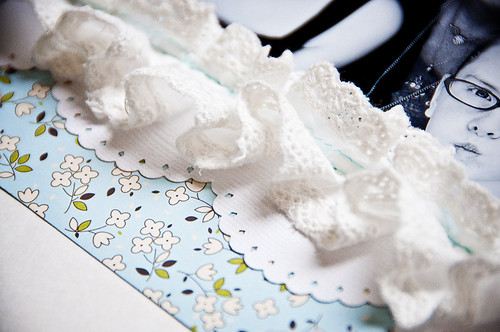
 I really wanted to emphasize the handmade touch to this layout, so I added stitching to the borders and stitched on the lovely lace that is included with the kit.

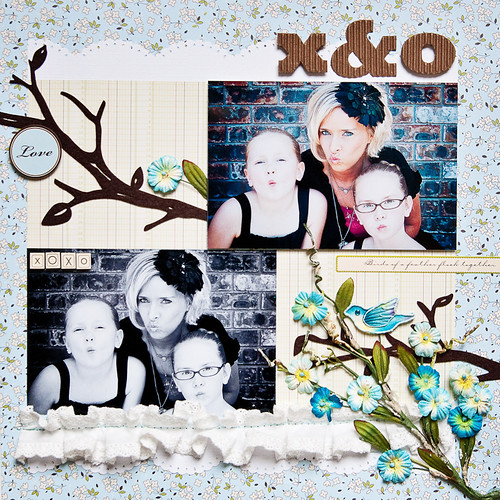
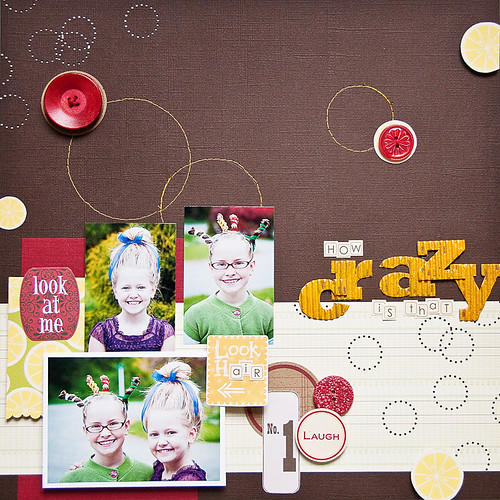
For this one I used some old photos of my son from almost 9 years ago. These photos were taken at his pre-school of him clutching his “bankie”. He absolutely loved his blanket and would not sleep without it. We actually purchased a second blankie so that we could snatch the original to wash it! lol
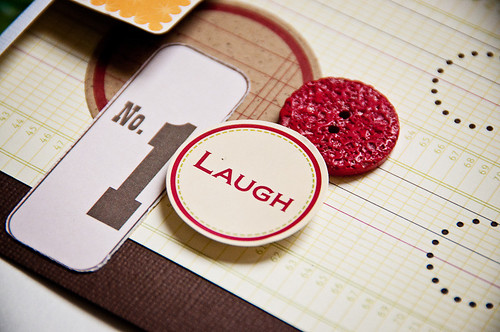
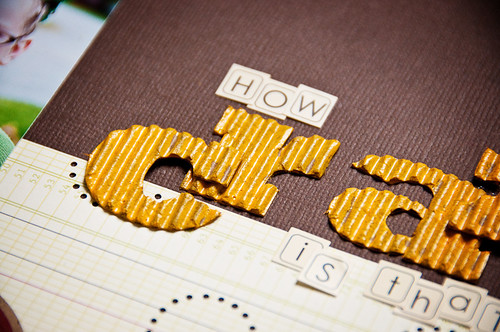
 I love the Jilly Bean Soup journaling spots and corrugated cardboard alphas! I sprayed the alphas with a bit of Tattered Angels “Glimmer Mist” then inked the edges before layering them onto the layout.

I used bits and pieces of the papers and embellishments that are included with this kit and still have TONS of product left over to create with! Stay tuned for more creations by me and the rest of the design team through out the month as we share faith, inspiration, challenges and more!
xoxo,
Tricia Wilson
Deprecated: Creation of dynamic property WP_Term::$cat_ID is deprecated in /home3/beautjm9/public_html/wp-includes/category.php on line 378
Deprecated: Creation of dynamic property WP_Term::$category_count is deprecated in /home3/beautjm9/public_html/wp-includes/category.php on line 379
Deprecated: Creation of dynamic property WP_Term::$category_description is deprecated in /home3/beautjm9/public_html/wp-includes/category.php on line 380
Deprecated: Creation of dynamic property WP_Term::$cat_name is deprecated in /home3/beautjm9/public_html/wp-includes/category.php on line 381
Deprecated: Creation of dynamic property WP_Term::$category_nicename is deprecated in /home3/beautjm9/public_html/wp-includes/category.php on line 382
Deprecated: Creation of dynamic property WP_Term::$category_parent is deprecated in /home3/beautjm9/public_html/wp-includes/category.php on line 383

Hello! I’m Diana, and I’m one of the DTs for My Paper Tree House! So, so excited to be a part of this team. I can’t even begin to tell you how amazed I am to be included with these women. They are all amazing crafters and wonderfully good-hearted women.
This page that I’m showing today is the first one I made with the kit once it arrived on my doorstep. Then, four pages and one card later, I am still playing around! This kit is chock full of goodies!
And yes, my son was put in that tree by me for the photo op! 🙂 The crown was in celebration of his fourth birthday.
Over the course of the week on my blog I’ll be showcasing the rest of the goodness that I created with this kit. If you are curious, here are some sneaks for you.


Thanks for hanging around with us today! We are all quite proud of this little endeavor that Nana started. We hope you will hang around with us, play some challenges, and learn some new techniques.
Thanks for stopping by!!!
Deprecated: Creation of dynamic property WP_Term::$cat_ID is deprecated in /home3/beautjm9/public_html/wp-includes/category.php on line 378
Deprecated: Creation of dynamic property WP_Term::$category_count is deprecated in /home3/beautjm9/public_html/wp-includes/category.php on line 379
Deprecated: Creation of dynamic property WP_Term::$category_description is deprecated in /home3/beautjm9/public_html/wp-includes/category.php on line 380
Deprecated: Creation of dynamic property WP_Term::$cat_name is deprecated in /home3/beautjm9/public_html/wp-includes/category.php on line 381
Deprecated: Creation of dynamic property WP_Term::$category_nicename is deprecated in /home3/beautjm9/public_html/wp-includes/category.php on line 382
Deprecated: Creation of dynamic property WP_Term::$category_parent is deprecated in /home3/beautjm9/public_html/wp-includes/category.php on line 383
This is my first layout I created. I did a lot of edge distressing (one of my all time fav techniques) and misted some bubble wrap for a one of a kind background.


I stitched burlap string up the center of the ribbon and sort of pulled it to create a “bunched” effect for a fun and cute dimensional embellishment.
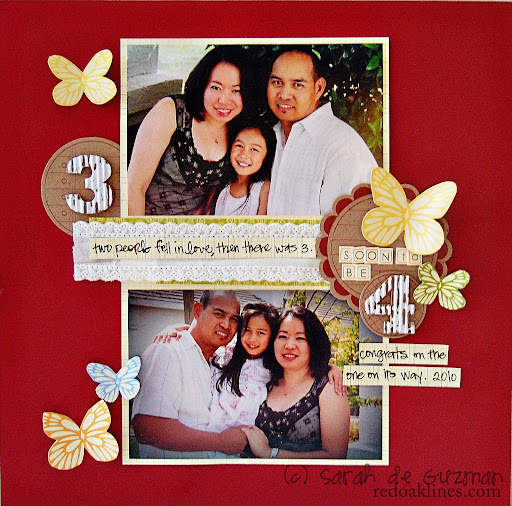
This is my next layout. It’s entitled Smile, it’s required. If your family is anything like mine getting them to cooperate during picture taking can sometimes be a tedious task. So for Mom’s Day one of my gifts to me was the girls (and my husband) were to cooperate while I took their picture. I loved it!! Hands down one of the best gifts I’d ever received lol!


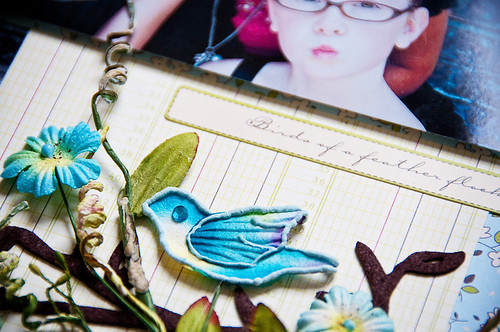
I loved that some of my team mates and myself think alike! How cute and simple is this to cut out a bird house from one of the patterned paper you receive in the kit and attach it to the tree (that you also receive) and voila!

This is my final layout to share with you all for now. This one I’m especially excited about because it incorporates my mini tutorial and if you’ll notice I used the backing of the packaging for the Corrugated Alphabet by Jillibean Soup which is included in the kit!


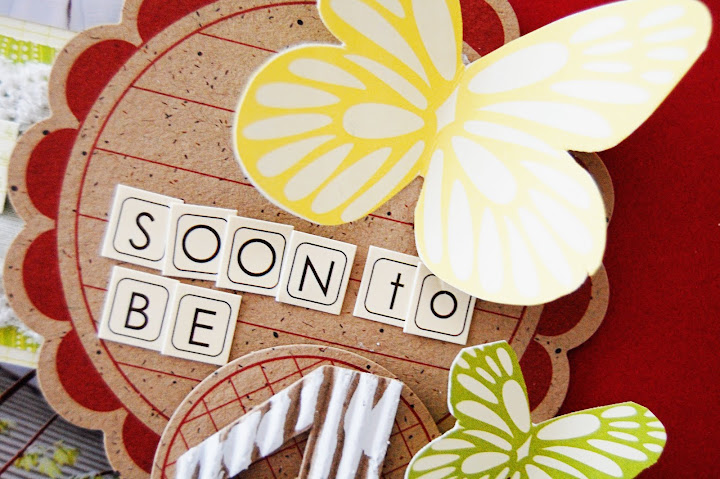
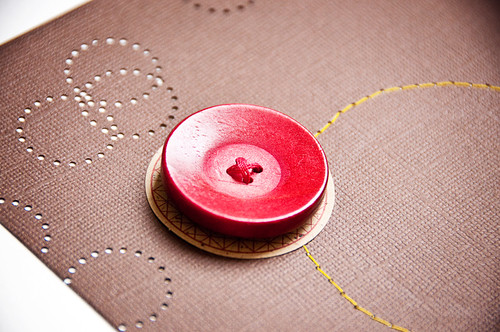
If you notice I used the scallop border sticker from the Jillibean Soup sticker sheet to create a flower. I had an epiphany when I was pulling the sticker off the sheet and noticed how easily the scallops bended. I thought to myself “that would be cool to create something different with” and so that’s how the scalloped flower was born.
Here’s how I did it:
Punch out a circle. I used a 1.5 circle punch. And start layering the scallop sticker along the edge of the circle.

Cut another 1.5 circle out and attach to the bottom circle and there you go! I ended up embellishing mine even more with the Jillibean buttons and Zva Chrystal flowers, both, of course, included in the kit.

Thanks for stopping by! I hope you are excited about My Paper Tree House kits and the inspiration you are seeing today!
Now get scrapping!
]]>Deprecated: Creation of dynamic property WP_Term::$cat_ID is deprecated in /home3/beautjm9/public_html/wp-includes/category.php on line 378
Deprecated: Creation of dynamic property WP_Term::$category_count is deprecated in /home3/beautjm9/public_html/wp-includes/category.php on line 379
Deprecated: Creation of dynamic property WP_Term::$category_description is deprecated in /home3/beautjm9/public_html/wp-includes/category.php on line 380
Deprecated: Creation of dynamic property WP_Term::$cat_name is deprecated in /home3/beautjm9/public_html/wp-includes/category.php on line 381
Deprecated: Creation of dynamic property WP_Term::$category_nicename is deprecated in /home3/beautjm9/public_html/wp-includes/category.php on line 382
Deprecated: Creation of dynamic property WP_Term::$category_parent is deprecated in /home3/beautjm9/public_html/wp-includes/category.php on line 383
Deprecated: Creation of dynamic property WP_Term::$cat_ID is deprecated in /home3/beautjm9/public_html/wp-includes/category.php on line 378
Deprecated: Creation of dynamic property WP_Term::$category_count is deprecated in /home3/beautjm9/public_html/wp-includes/category.php on line 379
Deprecated: Creation of dynamic property WP_Term::$category_description is deprecated in /home3/beautjm9/public_html/wp-includes/category.php on line 380
Deprecated: Creation of dynamic property WP_Term::$cat_name is deprecated in /home3/beautjm9/public_html/wp-includes/category.php on line 381
Deprecated: Creation of dynamic property WP_Term::$category_nicename is deprecated in /home3/beautjm9/public_html/wp-includes/category.php on line 382
Deprecated: Creation of dynamic property WP_Term::$category_parent is deprecated in /home3/beautjm9/public_html/wp-includes/category.php on line 383
Hope everyone has been enjoying all of the fun projects created by our DT so far! Personally, I have been blown away by the talent being shared up in these treetops!
…so what does everyone think of the first kit?! I think it’s totally rockin’. 😉 It’s cute, fresh, and fun. …and it’s versatile too! You’re all going to LOVE it!
Here are just a few of the layouts, I have created with this awesome kit:

…so what do you think?! It’s definitely a cute kit, right!?
Stay tuned because there is more inspiration headed your way.
Hugs,
sarah.
Deprecated: Creation of dynamic property WP_Term::$cat_ID is deprecated in /home3/beautjm9/public_html/wp-includes/category.php on line 378
Deprecated: Creation of dynamic property WP_Term::$category_count is deprecated in /home3/beautjm9/public_html/wp-includes/category.php on line 379
Deprecated: Creation of dynamic property WP_Term::$category_description is deprecated in /home3/beautjm9/public_html/wp-includes/category.php on line 380
Deprecated: Creation of dynamic property WP_Term::$cat_name is deprecated in /home3/beautjm9/public_html/wp-includes/category.php on line 381
Deprecated: Creation of dynamic property WP_Term::$category_nicename is deprecated in /home3/beautjm9/public_html/wp-includes/category.php on line 382
Deprecated: Creation of dynamic property WP_Term::$category_parent is deprecated in /home3/beautjm9/public_html/wp-includes/category.php on line 383
Wow, the big day has finally arrived and the monthly kit revealed, I loved using this kit. It was so easy for me to get inspired with all the goodies that I got to man handle. I love love LOVE the primas, but I also loved the colors, the papers, the ribbon, the letters, etc. etc. etc. LOL.


Deprecated: Creation of dynamic property WP_Term::$cat_ID is deprecated in /home3/beautjm9/public_html/wp-includes/category.php on line 378
Deprecated: Creation of dynamic property WP_Term::$category_count is deprecated in /home3/beautjm9/public_html/wp-includes/category.php on line 379
Deprecated: Creation of dynamic property WP_Term::$category_description is deprecated in /home3/beautjm9/public_html/wp-includes/category.php on line 380
Deprecated: Creation of dynamic property WP_Term::$cat_name is deprecated in /home3/beautjm9/public_html/wp-includes/category.php on line 381
Deprecated: Creation of dynamic property WP_Term::$category_nicename is deprecated in /home3/beautjm9/public_html/wp-includes/category.php on line 382
Deprecated: Creation of dynamic property WP_Term::$category_parent is deprecated in /home3/beautjm9/public_html/wp-includes/category.php on line 383


